Saturday, May 19, 2012

Thinking Back to yummy

This was just a great, yummy recipe that I tried and really loved.  I just wanted to share it.  I have a bunch to say, but I don't have time to get into it right now.  But I figured I would share this delicious treat.

This was a compilation of several pinterest finds.  I'm not sure that I even really looked at the recipes, I just saw the pictures and knew that I had to make it.  Now!

The components:

broccoli pesto
portabella pizzarettes and
pasta

Broccoli pesto: I happened to have both the fresh basil and the portabellas in the fridge, so this was just destined to happen! For the broccoli pesto, I cut up about a cup of broccoli.  I added a few leaves of fresh basil, and blended in my food processor while slowly adding olive oil until I liked the consistency.  Maybe a quarter of a cup.  Then I shredded about a quarter of a cup or so of fresh parmesan cheese and threw in some walnuts.  I didn't have pine nuts, that would have been too perfect! Season with salt and pepper to taste.

Portebella pizzarettes: So, this should really be the first step, but I didn't think of it until later.  You should totally marinate the mushrooms in balsamic vinegar for a little while before you start, it adds fabulous flavor.  Since the balsamic vinegar cuts through pretty easily, you don't need to marinate it for long.  It should probably be the first thing you do though, so the mushrooms can absorb that flavor while you get everything else together.  When you are ready to start cooking, put a scoop of marinara sauce in the mushroom.  I used Trader Joe's sauce, it was really tasty.  Usually I make my own, but I've been trying to use less canned goods.  And tomatoes aren't really in season yet.  Then a layer of cheese.  Bake this in the oven at 350 for about 15-20 minutes.

While the mushrooms are baking you can make up some of  your favorite pasta.  When that is done, toss with the pesto, add some more cheese, and take the mushroom pizzarettes out of the oven.  Spectacular!


And yes, I ate the entire plate....and finished what J didn't eat.  It was goooooood!

On a separate day I made these amazing peanutbutter cups.  I figured I could just toss them into this post.  So decadent.  So good. Totally worth the effort.  And pretty much guilt free!!

This recipe I adapted from this site, which is totally worthwhile to browse.  There are some amazing ideas there.  (http://www.ournourishingroots.com/honey-sweetened-gaps-peanut-butter-cups/).  These are actually GAPS legal..or can be done that way.  I will probably revisit these at a later date, but for now....indulge!

Home Made Peanutbutter cups; dairy and gluten free! And sugar free. Mostly.

I would have done a picture with the peanutbutter showing, but I kept eating them too quick.  Oh well, I'll just have to try again. ::super exaggerated sigh::

Since I didn't have all of the ingredients on hand for this recipe, mine is not as "good" per se, but still delicious!

For the chocolate, I melted down some semisweet chocolate chips.  You could use cocobutter, or unsweetened chocolate.  To that I added some raw honey to sweeten, and some coconut oil so that when the chocolate cooled it would have help to harden in to a nice shape.  I used one bag of chips, and probably 1.5 tablespoons each of the honey and coconut oil.

For the peanut butter, I put it in the microwave for a quick minute just to soften it a little, then I mixed in some honey to sweeten it some.  And  a little extra salt for contrast.
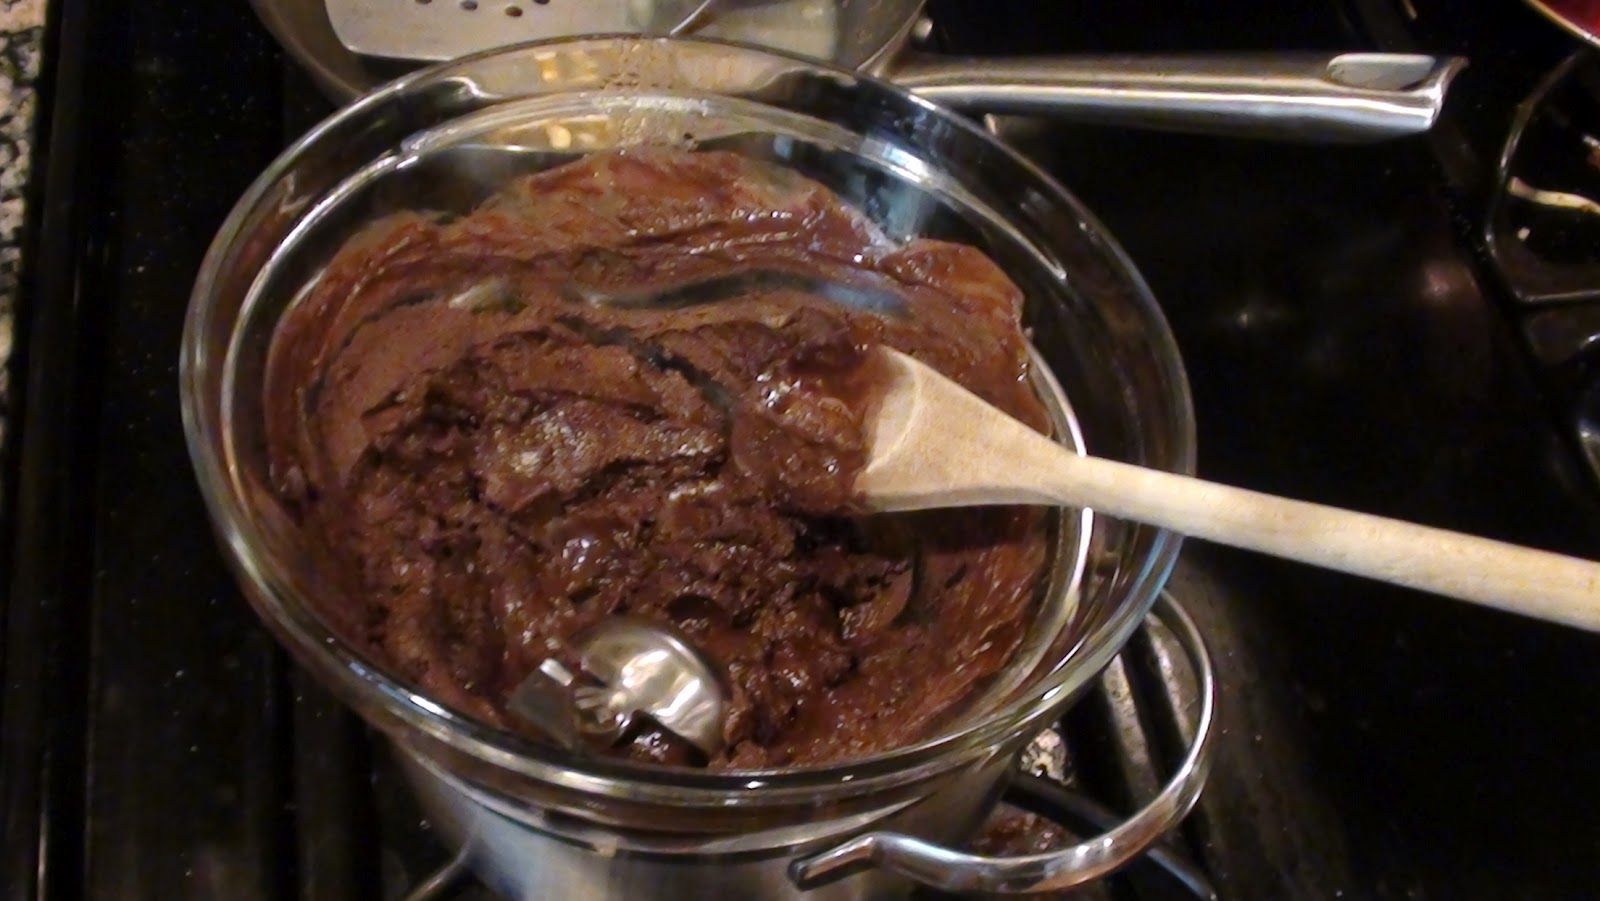

The chocolate mixture was in a double boiler set up, and I took my tablespoon and scooped out the chocolate into my mini muffin pan, which I had lined with muffin wrappers.  It was hot.  But I suffered through it! I put a small scoop into the bottom of the pan, then I used my fingers to flatten it out.  Then I put a small scoop of peanut butter on top of the chocolate, then finished off with another scoop of chocolate, which I pressed out to make sure it covered all of the peanutbutter.  And repeat.  Until you run out.
You do have to work a little quick though, since the chocolate will begin to harden as it cools.

When you have finished setting up the cups, put them in the fridge to cool.  The chocolate with the coconut oil will harden and the muffin wrappers make the nice edges so that when you take them out, they look like real peanut butter cups!  Absolutely amazing.  They are pretty rich too, so you won't be able to eat too many.  Or maybe you will........

Monday, May 7, 2012

Out of the Fog and Back on the Soap Box

So, I finally did it.  I succeeded in cutting dairy back out of my diet! Whoohoo! It's been about a week, and most of the withdrawals have worn off.  I'm starting to feel more "normal" again.  ::sigh::

It's funny, in the midst of trying to cut it out, it seems like there is this huge mountain in front of you, and someone just told you that you needed to move it.  Oddly enough, the hardest part is just coming up with the courage to try.  Now that there is momentum, all I need to do is keep up with it.  Sure, it will be annoying to go back to reading labels, and going out to eat is going to be more complicated.  But now I'll have the energy back to deal with it.  It's not the end of the world. 

The other thing that I forgot about from the last time I went dairy free, is how much less I need to eat.  It's almost counter-intuitive for me, since I tend to get a lot of calories from dairy (cheese, cream, etc).  But, the food cravings have almost completely diminished.  Now I am only hungry when I actually need to eat.  Weird, huh?! Part of that is that I have actually been able to get the bread out of my diet too.  I think that is a major contender for the scary withdrawal thing.  I suspect this, because I always have the worst withdrawals/cravings after a burger or a sub.  Those things are EVIL! But oh-so-delicious, and seriously they are the reason why it has taken me so long to get back on "track". 

So where to go from here? Well, first I need to let myself readjust to eating and cooking without dairy or bread.  The one caveat is that I have not cut out butter.  I am making ghee, or clarified butter, since most of the "allergens" are removed, and I need something to cook with other than coconut oil.  (yes, I also started reading about how olive oil goes rancid when used at high temperatures, and now that I can actually smell when that happens, I feel like I need to avoid that too.  there is always something, it never ends!) Once I have that in the bag again (hopefully it won't take too long!), I can start tweaking other issues.  For instance I have been having a somewhat scary reaction to something, and I don't know what it is.  What the food is; the reaction is rather unnerving, and it doesn't feel good at all.  It happens mostly at night, and I feel as though my body is going to jump out of my skin.  I have heart arrhythmia/palpitations, and I actually feel like I convulse.  I believe this is an anaphylactic reaction.  It's something that I used to experience on occasion, but it's happening more and more often and it's getting worse.  I used to think that it was to gluten, but the symptoms showed up even after I cut the gluten out.  I have a feeling that it's related to yeast though. 

Anyway, hooray for fighting through the fog! Maybe now that I am getting through the brain fog, I can attempt to reclaim some control over my house...time to get cleaning!

Thursday, April 26, 2012

Hopping on the Green Smoothie Train

Wow, it's amazing how when the weather get's nicer and the days get longer....I still don't have "enough" time! Luckily though, this is usually because Nick and I are outside enjoying nature and playgrounds.  I can live with that!

If you have been looking at any blogs similar to the ones I follow, you will have noticed by now that everyone has a green smoothie recipe that they rave about.  Well, I am no different! I made a couple attempts at trying them in the weeks prior to this, but have always had trouble finishing them, and I only did because I knew what I was doing was good.  That is because I foolishly looked at the ingredients and thought, "nutbutter and spinach? no way that could be good!".  Well, let me tell you that I finally tried it, and boy did that make a difference!

In case you don't know, green smoothies are an excellent way to incorporate those really, really, really good nutrients in an easy, delicious way.  And you will probably get a lot more in than you would if you tried to just eat each ingredient on it's own.

I adapted my recipe from one of my favorite blogs, "Oh She Glows", http://ohsheglows.com/2011/01/13/classic-green-monster/.  This is yet another one of those recipes that you will adapt and change with what you have in the fridge, but I have found that having a few of the ingredients is a must, at least when you are just starting out on the Green Smoothie train.  I use my immersion blender to make my  smoothies, and I fill up the blender cup most of the way with spinach.  Obviously, any leafy green works here, but I typically get some really yummy spinach in my Veggie Delivery.  Being a green smoothie, this is an important ingredient.  The next thing, which surprised me, was the nut butter.  You could use peanut butter, almond butter, sunflower seed butter, whatever you like.  But this adds a bit of protein, and oddly enough cuts the spinach taste in the most wonderful way!.  I use about one and a half tablespoons.  The next ingredient that is a super nice boost is a tablespoon of coconut oil.  It's got natural antibiotic and antifungal properties, plus it's loaded with healthy fat.  Score! Then I add in a tablespoon or two of ground flax meal.  This has good Omega 3 fatty acids, and also is a really good way to keep things....regular.  If you are not accustomed to using flax seed meal, start with a small amount and work your way up.   Trust me.  The final important aspect of this is to put some kind of frozen fruit in.  Bananas are really easy, inexpensive, and taste great with the mix.  Next you can add in yoghurt, almond milk, fruit puree, honey, or a number of other fruits and veggies you have around.  If you use too many berries, your smoothie may not be green.  This may or may not help the look of your drink!

As you can tell by my excessive use of exclamation points, I feel really good after having a few of these.  The other reason why I love these, is that it actually makes me feel full for a long time, which is really hard to do. My other recommendation is to only make what you will drink in one sitting.  These will not hold up well in the fridge, unfortunately.  Especially if you decide to throw an avocado in there.  That will taste great, but it will turn brown after a little while.  That is not appetizing. Anyway, I get to fill up the cup my immersion blender came with, and it's enough for two normal people (i.e. two of these mason jars), or one nursing Mom. 
Ingredients:

1 frozen banana
1 handful of spinach
1/4 cup yogurt
2 tablespoons peanut butter
1.5 tablespoons of ground flax meal
1.5 tablespoons nut butter
1 tablespoon coconut oil
enough liquid (almond milk, pear puree, orange juice, etc) to blend

Possible additions/substitutions: kale, collard greens, mixed greens, lettuce, yard greens, cucumber, carrots, avocado, mango, strawberries, blueberries, raspberries...you get the idea! Try to have more veggies than fruit though!

Thursday, April 12, 2012

Relapse

So, at last post I was doing fabulous! I had been sick, and I felt like all of the uckies had been cleared out, and I was ready to start fresh and get on the GAPS train.  I was drinking my beet kvass at least once per day, making broths, and feeling really good.
Then Nick got sick.  Poor kid! He was projectile vomiting huge amounts.  But when he wasn't throwing up, he was almost like normal, it was really hard trying to get him to rest and feel better.  Eventually it passed.  Then J got sick.  It's not common for J to get sick, but when he does, he gets sick hard.  Fever, chills, sleeping most of the day - the works.  And then after a few days it passed and he felt better.  It was almost a week, and I was still doing okay.  I was psyched, I thought that I had outsmarted this round of sickies.  But it turned out I was just as vulnerable as the rest of the area, and I got the pukies too.  Sad.  Needless to say, having the bug go through our house at such a pace, left our place in shambles.  Plus, after I had experienced my come up uns, I needed to have bread.  I cannot describe the need in words, it just had to happen.  So I did it, I ordered out.  Vast amounts of burgers and subs.  And I got toast, and ate breakfast sandwiches, and just really over did the whole "cheating" thing.
Needless to say, there have been consequences.  Ugh.  This is an addiction worse than quitting smoking.  I swear. Except when I quit smoking, people "got" what I was going through.  When you tell people that you are trying to "eat healthy", or are avoiding certain processed foods, there is a stigma that you are depriving yourself.  People don't know how to handle it.  They don't know how to accommodate you when you get together.  And it feels really akward to always have to be asking what's in the food. And temptation is everywhere! Especially when you are sick and it's just so convenient to get delivery.  
Now, I know my symptoms aren't as bad as they could be, and I feel like they are more subtle than they used to be...and if it were just me, maybe I could just deal with things...I say this because I am in denial.  I really feel gross and awful.  Things aren't normal or regular.  Not only that, but I don't want Nick to have all of the same issues that I have had.  I want him to be happy and healthy, and to feel good.  And to not have to worry about all of this junk. 
I know I just have to "do" this.  I have to come up with a game plan to eat well for myself, and to find a way to make food for Nick that is achievable.  At least he's getting to the point where he can help :)

On the plus side, the sauerkraut that I had started came out fantastic! I was afraid that since I didn't weigh down the cabbage enough that it was going to get moldy, so I only let it sit for about 2-2.5 weeks.  Next time I will actually shred it rather than cut it, and it can definitely sit for longer.  The best part was that Nick actually liked it too...I was amazed.  Not only that, but J ate nearly half of the first jar in one sitting.  I'd call that a success!

To make the sauerkraut, just take the core out of the head of cabbage, and quarter it.  Shred the leaves, and as you shred each quarter, layer in a bowl then sprinkle a good amount of sea salt in between each layer.  When you are done shredding, push the cabbage down with a spoon to break down the leaves.  Let it sit for a couple of hours to let the salt draw out the liquid.  Once there is a good amount of water in the bowl, transfer the cabbage to a half gallon mason jar.  Use the water to cover the cabbage, and use filtered water if needed to make sure that the cabbage is fully submerged.  Use a weight to put on the cabbage to make sure that it stays submerged.  Cover loosely and let sit for several weeks.  I waited for at least two weeks before I tasted mine, and if I had a better set up, I would have let it go longer for sure.  But at two weeks, it wasn't bad :) And you can use either red or white cabbage. 


Friday, March 23, 2012

Beet Kvass - Step One!

My first step in starting GAPS is really finishing up a lot of what I have on hand, and just replacing it with appropriate foods.  At the same time I need to start implementing some probiotic foods.  My first attempt at lactofermentation is with beets.  Simple, sweet and sour, and easy!

To start, I cut up one bunch of beets, this time was about 3 medium sized beets.  I added them to my sprouting jar, but a half gallon mason jar is the "appropriate" size.  To the beets I added a tablespoon of celtic sea salt, then mostly filled the container with filtered water.  Stir. 


Cover, and let it sit out on your counter for a few days.  You can also use whey to speed up the process (use a half cup of whey, and only a pinch of salt if you do it this way).  You can get whey from the top of a good organic yogurt, or you can let (preferably raw) milk separate.  The liquid is the whey.  Since I need to cut dairy, I'm sticking to just salt, but it takes a bit longer for the process to get going.

I started my kvass on Sunday afternoon, Monday morning it looked exactly the same, so I left it be.  Tuesday morning there were the first signs of bubbles on top - this is how you know it's working.  I tasted it then, and it was still very sweet, and very salty.  But not bad at all! But I could tell that it still needed time.  So I let it go until Wednesday, and tasted again.  This time it was a little more sour, but I wanted to wait one more day.  Thursday, I could tell that it was good, and so I poured it off and put it into the fridge.  I can tell that this will be an "aquired" taste, however, it wasn't bad! Also note that my body actually FEELS nourished when I drink it.  That's pretty sweet!

Having been drinking the kvass in the mornings, I notice that my cravings have diminished a ton.  Which also has to do with the fact that I stopped eating sugar.  It's amazing how (insert comforting term here - normal, comfortable, relaxed, even, calm, better!) I feel.  This is good. 

So drinking the kvass on it's own is okay, but I decided to make a shake for a snack.  There have been tons of posts about everyone trying these Green smoothies (which I will go into in another post!) using spinach, kale, and other green fruits and veggies, so I decided to try a berry smoothie.  It was goooood! 

I used about one cup of the beet kvass, half a cup of orange juice, two teaspoons of coconut oil, a few frozen mixed berries, a frozen banana, and a handful of spinach for good measure.  I just threw everything into a big cup and used the immersion blender to blend it.  It was delightful! 


It would also be pretty yummy as a popscicle, but that would probably kill the probiotics.....

I would highly recommend this cleansing tonic to anyone and everyone!

Friday, March 16, 2012

The GAPS diet has officially begun!

Yup, the tides have turned.  After having a miserable weekend, in terms of allergy reactions, I have had ENOUGH! I'm sick and tired of wondering which foods are making us sick, being worried about future effects, and the long term effects for always being in a state of inflammation. 
It's weird, after being sick all weekend, I feel as though my body has cleansed itself of a lot of toxic "stuff".  I have felt better than I have in a long time.  But as the week has gone on, I have been slowly returning to the ucky status "quo".  Instead of always living in fear of side effects from the very foods that are supposed to be nourishing me, I want to try to heal my body.  That's where GAPS comes in.  Following the "rules" of the GAPS diet should help detoxify my body and allow me to go from this state of dis-ease to a state of ease...and I'm taking my son (and hopefully my husband) with me!  And anyone else who want to join us on this journey.
This is not a temporary quick fix diet, this is a total lifestyle change.  And I have made the choice to be committed to the change.  I hope those around us can be supportive of this choice - most people who have tried to "diet" or "eat healthy" know that the hardest thing about trying to change, is having the loved ones around you constantly (even inadvertently) sabotaging your efforts.  So I hope that we all have the strength to stick with this.  I know I do.  I have made a choice to do this, because I can no longer accept the consequences of what can happen if I don't. 
It feels really good to make that choice. 
My first job is to find some good GAPS recipes and practice some of the cooking techniques.  Taking long hot baths was also recommended to me...woohoo! Getting good sunlight, a probiotic, Cod liver oil, and a few other odds and ends.  And using up all of the "GAPS Illegal" food in my pantry.  These are things like pre-packaged food mixes and cereal (anything that comes in a box), all grains, all starchy veggies, and all refined sugar.  And for me, dairy for the first six weeks of being on the first GAPS diet.  Oh well. 
Here we go!!

Saturday, March 10, 2012

Leeks!

I love leeks, but many of the recipes I know involve using them in a torte.  Which is very tasty, but something I have regrettably had to give up.  So when leeks showed up in my basket, I needed to figure out some new ways to incorporate them into my meals.  I wasn't really in the mood to do a leek soup (I like leek and potato soup, or leek and asparagus is really good too!), although I did use the greens in a vegetable stock.  So I found some recipes for potato and leek pancakes, and then I imagined a neat way to incorporate them into the polenta I had sitting in my fridge. 


Okay, so there are a million recipes for potato pancakes out there, and quite a few with potatoes and leeks.  (If you couldn't tell, potato and leeks go together like cookies and milk :) )  My challenge was to do this without eggs to bind them together.  I didn't really have any egg replacement things on hand that I thought would meld well, so my pancakes did NOT stay together...but it still tasted delish!  For a more suitable pancake add flour and/or egg to bind the potatoes and leek together. 

To start, slice your leeks in half the long way, then rinse very well.  Chop off the very green area, and toss out, or toss in a pot to make a stock with.  The part you want is the white and light green areaa.  I usually incorporate a bit of green too.  For looks, and to stretch out how far the leeks will go.  Then, slice into thin half coin slivers...I usually rinse again in a strainer.   Sautee in either oil or butter for about 5 min, or until tender.  If I have multiple leek dishes to make, I always prepare all of the leeks at once, then divide.  It's just easier.

Next is the really fun part.  NOT! Peel and rinse your potato, and shred into a bowl lined with a clean dishcloth.  You could shred the potatoes into some cold water to prevent them from turning brown.  Feel the burn!  I guess this step will be easier for those of you who just pull out a food processor with a shredder attachment.  You want to have about a 1:1 ratio of potato and leeks.  Once you have shredded enough potato, use the dishcloth to squeeze out as much water as you can. 


Then, add potato, leeks, and about a good cup of grated parmesan cheese to a bowl.  Add about a table spoon of olive oil to coat, and incorporate.  You will probably want to add some salt and pepper.  Thyme and rosemary work well too.  Here is where you would add flour or egg to make a real pancake.  :)


Once ingredients are mixed, form into pancake - like shapes, and put into a hot pan with a little oil or butter.  They should only take a couple of minutes per side.  I did about 5 min per side, and got them nice and brown.  But they kinda fell apart when I flipped them.  It was okay, I topped my potato leek mound with ketchup and sour cream....and then ate the entire batch!


This polenta dish is a way for me to feel indulgent, since the types of breakfast foods I can eat are diminishing by the day!  This idea came to me in a round about way, and when I make it again, it will be really easy to simplify. 

One Sunday, I decided to try out "The Pioneer Woman's" Goat cheese and polenta with braised short ribs.  (http://thepioneerwoman.com/cooking/2009/11/creamy-polenta-with-goat-cheese-heaven-on-a-plate-part-2/).  It was pretty good, but I would have liked the polenta a bit thicker.  She used at least a 4:1 ratio of liquid to polenta.  She also said that it would serve 4 people, and we had a TON of leftovers! Which is saying a lot, since both Jason and I eat quite large servings. 

Since we had a lot of leftovers, and I wasn't totally crazy about the goat cheese flavor in the polenta, I decided to try to "fix" it.  Firstly I wanted to thicken up the recipe a little, and secondly, I wanted to do more than just use it as a relatively boring side dish.  I started looking up recipes, and found some fabulous looking recipes...but none of them were in English! I could tell from what I saw that polenta had a LOT more potential than I gave it credit for.  Baking or frying it could do things that would make it out of this world! So I whipped up another batch of polenta, using a 3:1 water to corn meal ratio.  Then I took the old polenta out of the fridge....and it was solid! Kind of like a jello! Hmm, this could be interesting.

I managed to incorporate the old polenta into the new polenta, then I put it in a glass baking dish and put it in the fridge to cool. 

When the polenta was solid enough to work with, I took it out of the fridge and turned it upside down onto a plate.


 I carefully, but not carefully enough! cut through the middle of the polenta mass, so that I had a top and a bottom.

 I laid the "bottom" back into the baking dish, then I spread the leek, potato, and cheese mixture that I had saved onto that.  It wasn't "enough", so I sauteed some grape tomatoes and spinach in oil, and once the spinach was wilted, I added that over the leeks, then covered that with freshly grated parmesan cheese.  Then I carefully flipped the polenta "top" back into the baking dish, and grated more cheese onto top for good measure.


 Then I baked it all together for about 20 minutes. Yum!


To simplify this entire process, you could sautee your "filling" ingredients while the polenta cooks, then mix them right into the polenta while it's still in the pot.  Then transfer the entire thing into a baking pan and bake for a few minutes.  Much easier, but not as cool looking :)

INGREDIENTS:

Pancakes:
1 medium leek
1 medium potato (or several small, you need a 1:1 ratio of potato to leek)
1/2 cup parmesan cheese
thyme, rosemary, salt, pepper to taste,
oil/butter for cooking

 Polenta:
2 cups corn meal
7 cups water (plus a little extra in case it gets too thick)
1 medium leek
1 medium potato (or several small, you want a 1:1 ratio of potato to leek)
1/2 cup parmesan cheese
3 oz spinach
1 cup of grape tomatoes
thyme, rosemary, salt, pepper to taste

Note: To make polenta, bring water to a boil, then add corn meal in a steady stream while mixing constantly.  Once cornmeal is in water, turn down to a simmer and cook for about 15 minutes while stirring constantly. 

Also, I usually don't add salt to my recipes, since I will just use it to season at the end if needed.  You will probably need salt with these recipes! It really makes an impact, particularly with the corn meal :)